

This shows how to install WiX build tools and WiX toolset Visual Studio 2019 extension on your PC. The tools are required to create a WiX Project in Visual Studio 2019.
Table of Contents
Download WiX build tools and Visual Studio Extension
You need 2 packages to download: WiX Toolset build tools and WiX Toolset Visual Studio 2019 Extension.

Install Wix Build Tool
Run the wix311.exe and click Install from the pop-up Menus as below.

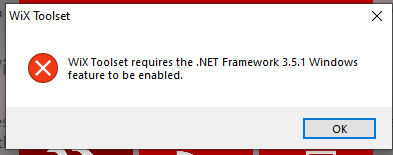
Turn on Windows Feature .NET 3.5 if you see Wix Toolset requires .NET 3.5. And retry Wix Build Tool installation.

Install Wix Toolset Visual Studio 2019 Extension
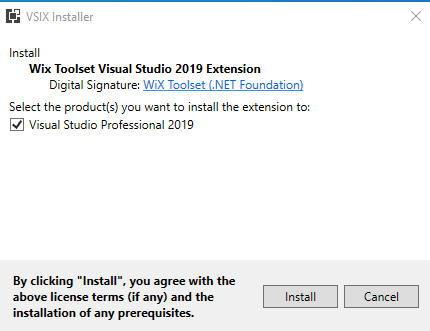
Close Visual Studio if opened.
If you run Votive2019.vsix that downloaded, the VSIX Installer dialog appears. Click Install.
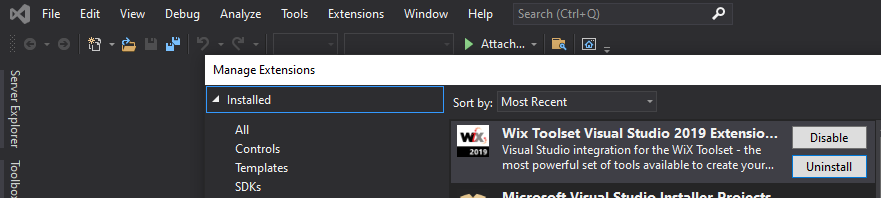
When the installation is completed, the WiX dev environment is ready. You can confirm if Visual Studio has the extension.
Create a Simple Wix project
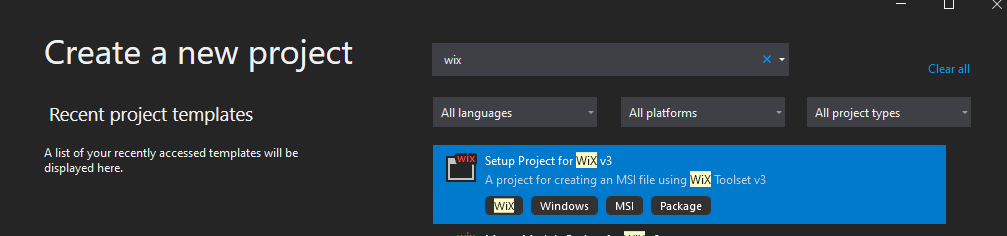
Open Visual Studio, select “Create a new project”, type wix in search, and select “Setup Project for WiX..”
In the next windows, assign Project name and location, etc.
Now, wix project and folders were created for the project

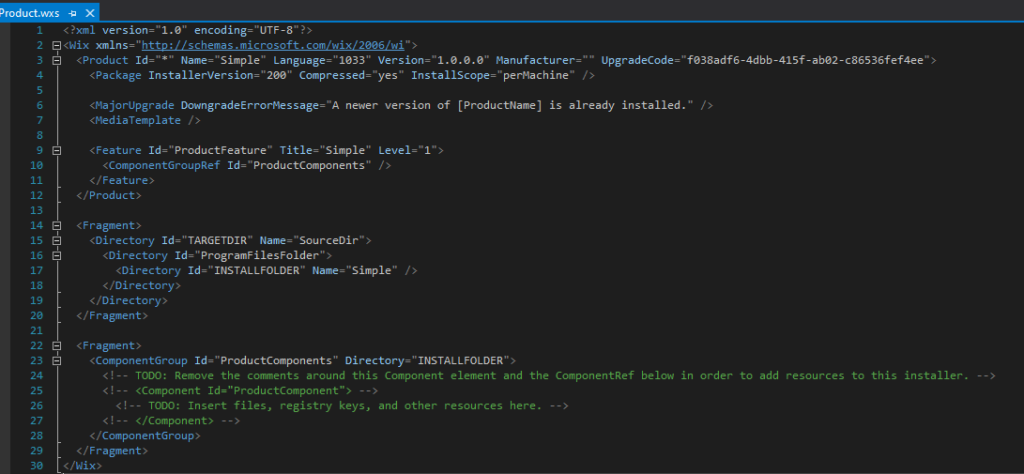
Edit ‘Product.wxs’ upon needs
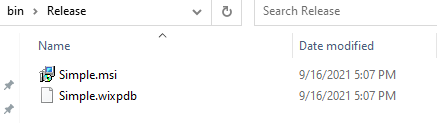
Type Manufacturer and start building. MSI has been created in the output folder.
Run:
You may be interested in reading more articles:
How to add a Custom Dialog in Wix Installer
How to update XML File during Install in WIX
How to Exclude Files Using XSLT in Wix Installer
How to add all files from a folder to MSI Installer using WIX