

This article shows how to create a snapshot from EC2 volume, and restore an EC2 instance from the snapshot from AWS Elastic Block Store.
Table of Contents
Create Snapshot
If you click an Instance Id of EC2 instances, Instance Summary will appear and Volume ID can be found in Storage Tab.

If you select the volume, it goes to Volumes List of EBS, Elastic Block Store.
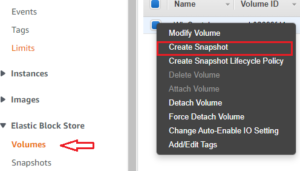
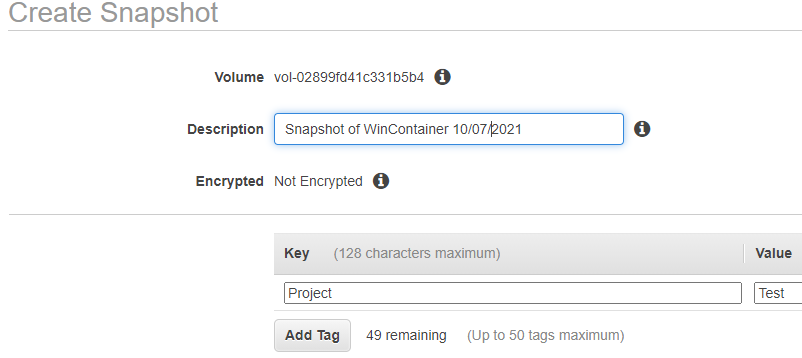
Right-click the volume, and select Create Snapshot.
Add Tags to manage resources, such as the Owner’s name and Project name to identify each resource. You can check the progress of Snapshot in the Snapshots list under the Elastic Block Store section.
Restore Volume from Snapshot
1. Get Volume Information
If Snapshot is available, you can restore to the original EC2 replacing the current volume with the stored snapshot.
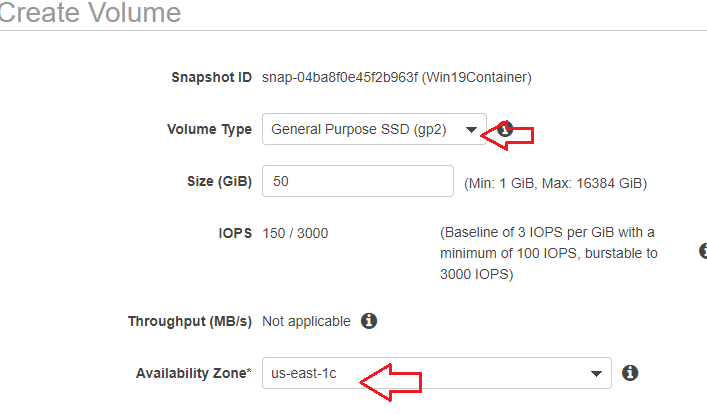
Go back to the Volumes list under Elastic Block Store Section, select volume. It shows detailed information about the volume. It is especially important to write down disk mount point information such as /dev/sda1, Availability Zone, and disk type information so that the same settings could be used when restored.

2. Detach Volume
Right-click the volume, and select Detach Volume.

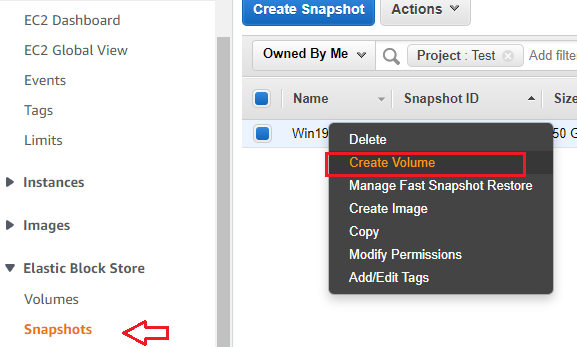
3. Create Volume from Snapshot
In the SnapShots list of Elastic Block Store section, select Snapshot and click “Create Volume”
In this function, EC2 instances having a Tag ‘Test_StartEC2’ will be started.
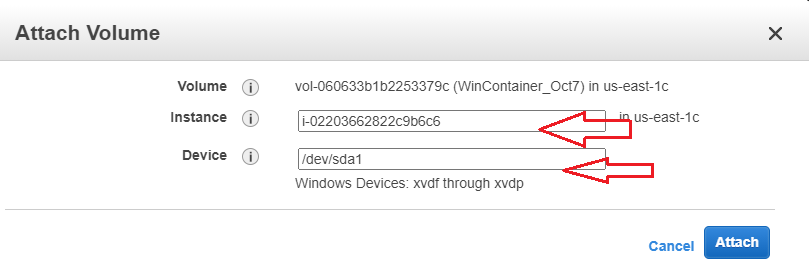
Attach Volume to EC2 Instance
The last step will be attaching the created volume to the EC2 instance. Instance list will be populated for the region, and select the target one. Type disk mount point as the device name.
devices name is to be typed.
Private and Public IP addresses can be changed when the volume is replaced if Elastic IP is not assigned for the instance.
The detached volumes may still be in the volumes list, and you may delete the obsolete volume that you want to trash in the volumes list.
You may read another article on how to create EC2 Instance.